What are we talking about when referring to “video ready teaching materials”? In the media world they talk about getting production assets organised. These could be your main footage (A-roll) with some supplemental (B-roll) to help explain or emphasise a topic as well as introductory pre-roll. In the world of commercial media, the purpose is to simply entertain, however, in education the purpose of the video is to educate. This can be achieved by delivering a voiceover presentation, sharing new concepts, theories, and technical information, all of which can easily overload the student’s ability to assimilate learning material. This section will be broken down to cover what we consider to be the most common video ready teaching materials for academics.
Another consideration is using supporting teaching materials for example a glossary of terms or an overview of a piece of apparatus, this will help to introduce students to new concepts and vocabulary before watching the recording. This can help to demystify the topic and reduce cognitive load in the lesson, enabling the student to focus on learning.
The Pre-Training Principle | “People learn more deeply from a multimedia message when they know the names and characteristics of the main concepts.” (p. 189)
Mayer, R. E. (2009). Multimedia learning (2nd ed.). Cambridge, England: Cambridge University Press.
Therefore, we must be mindful to keep the content as focused and clean as possible, which in turn, will also make the content more accessible. Typical teaching materials used in educational videos:
- Slide-based presentations such as aPowerPoint show
- Visual aids such as diagrams, physical samples, models, pictures, video, infographics, animations…
- Voice over
- Footage, talking directly to the camera
Keep it simple, focus on the learning
Visual aids
The Coherence Principle – “People learn better when extraneous material is excluded rather than included.” (p. 89)
Mayer, R. E. (2009). Multimedia learning (2nd ed.). Cambridge, England: Cambridge University Press.
Studies have shown (Effects of Segmenting, Signalling, and Weeding on Learning from Educational Video) that some of the most effective instructional videos keep things clean and simple, they are highly focused, drawing attention to key information and keeping large blocks of on-screen text to a minimum.
In higher education, it is common to use slides as your main source of footage, it is essential that you keep these as clear and focused as possible. When possible, these principles should be applied to all types of visual aids. In an earlier learning x series, we have some great examples that you can look at in the sequence and layout section.

Keep
- Only include graphics, text, and narration that support learning goals
- Have a label close to the image they relate to
- Break down slides – think about reducing long bullet lists
- Talking directly to your students in a natural manner in front of a simple backdrop
- Simplify images if possible
- Crop the image
- Reduce the information
- Do you need the image?
Avoid:
- Additional decorative images
- Logos (if possible)
- Unnecessary animation
- Background music
- Pre –roll (Opening credits, branding, animations) unless the recording is going to be out of context of your module, i.e. published to a outside institution
Title Slides / Signposting
Title slides are a great way to break up your content as they can create chapter points and are a wonderful way of Signposting your content and can aid the ‘chunking’ . Whether they are for a separate recording or a linked chapter, title slides/chapter points are useful for transitions and edit cuts. They also allow the learner to refocus and get back on track.
- Break the slide deck down into clearly labelled, defined, manageable sections (as highlighted in Acquisition). This avoids the danger of information overload.
- Focus on one new concept at a time in the video or in a navigable link
- Number content – Using a hierarchical numbering convention helps user identify progress and location.
Voice over script
Many experienced academics feel comfortable talking adlib about their subject matter, which can produce a natural delivery, helping to build the connection with the student. Counter to this, the merits of using a script, include helping you to stay on topic and hit all the key learning objectives, which again can make the content more accessible and can assist in cross-checking closed captions.
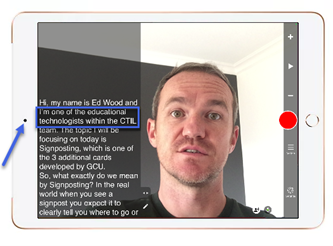
Ultimately it comes down to the academic’s preference and the script/no script decision may come down to other factors such as (but not limited to) the length of the recording, how core the word-for-word message is to the learning outcomes and the location of the shoot. Your script could be verbatim, or it could just cover some of the key points that you plan to cover in your recording either way you will want to be able to see your script when recording. Below are some tips and tools that can help:
- Notes pane in PowerPoint (viewable in presentation mode)
- Word document (if you do not have video of yourself, it can be a lot easier to use a physical or digital script)
- How to use Microsoft Word as a teleprompter
- Web based free teleprompter software
- YouTube link: 09:02 Apps that replace a teleprompter for iPad and iPhone (Video Teleprompter)
- YouTube link: Teleprompter App for Android (Nano Teleprompter)

Seductive Details
While it can be tempting to include anecdotes and entertaining stories, we must be mindful of the cognitive load of the student and keep the focus on learning. We know that Concrete Examples can aid the learner’s ability to understand complex ideas, so, if you feel the anecdote or example really adds to the learning without overshadowing the content then include it. Similarly, if you have a relevant entertaining anecdote, it is advised that it is added at the end of the presentation so that it is not competing with the educational content.
”… it is important to understand that catchy and fun concrete examples can potentially overshadow the essential understanding by drawing students’ attention to the fun (seductive) surface information at the expense of them grasping the underlying principle (the reason you used the example in the first place). This is what the majority of research presented in this talk seems to suggest (although there are counterexamples (1) and (2), too). In any case, after offering students with multiple concrete examples for an abstract principle make sure that you highlight to them how the examples are linked to the principle you are trying to explain.”
From the blog post & talk from the session Effects of Seductive Details on Learning and Memory – A Reflection from Dr Carolina Kuepper-Tetzel from the University of Glasgow (formerly from UoD)
Discussion point

Considering the seductive details argument, can you think of examples of concrete examples that are relevant to your discipline?
How/when might you share constructive anecdotes with your students outside of your teaching materials?


I’ve just seen https://www.neilmosley.com/blog/five-tips-when-thinking-about-video-in-online-learning – I could have shared it on any of these posts, but thought I’d put it in this one.
It’s made some useful points – many very similar to those that Ed & Andy have made in here 🙂
That’s a great link thanks Emma, it’s from Neil Mosley, I would advise anyone with an interest to have a look, the five points he covers are:
1. Give yourself some creative constraints.
2. Consider using a combination of visual and verbal
3. Tread carefully when it comes to interactivity
4. Use a video as an opportunity to hone your message
5. Remember video like everything else takes practice