Introduction
As we outlined previously the ABC design approach normally runs as a workshop and after the model and the learning types have been introduced and discussed participants begin to turn their attention to the design of their own modules.
So now that you’ve worked through this Learning X series and taken time to reflect on the various learning types, and perhaps also explored some FutureLearn or OpenLearn courses, the next step is to apply your thinking to the design of your own module and teaching. An effective way to approach this is to storyboard your module using the learning types.
At the start we introduced the idea of “cards”, and you’ll see that these have been a key feature across the series and helped us to present the learning types. You’ll also hopefully have downloaded the full set of cards as a PowerPoint file.
If we were running an ABC workshop on campus, once the Learning Types had been introduced and discussed, we’d ask participants to break into small groups (e.g programme or module team) to discuss the different activities they will be using across the whole lifecycle of a module. The teams take a large module planning sheet that’s divided into rows with each row representing a week or a section of the module. As they begin to review and consider the teaching, they begin to identify which learning types can be best applied to help students achieve the desired learning outcomes. The appropriate learning type cards are then sequenced on the module planning sheet to present the overall design of the module.
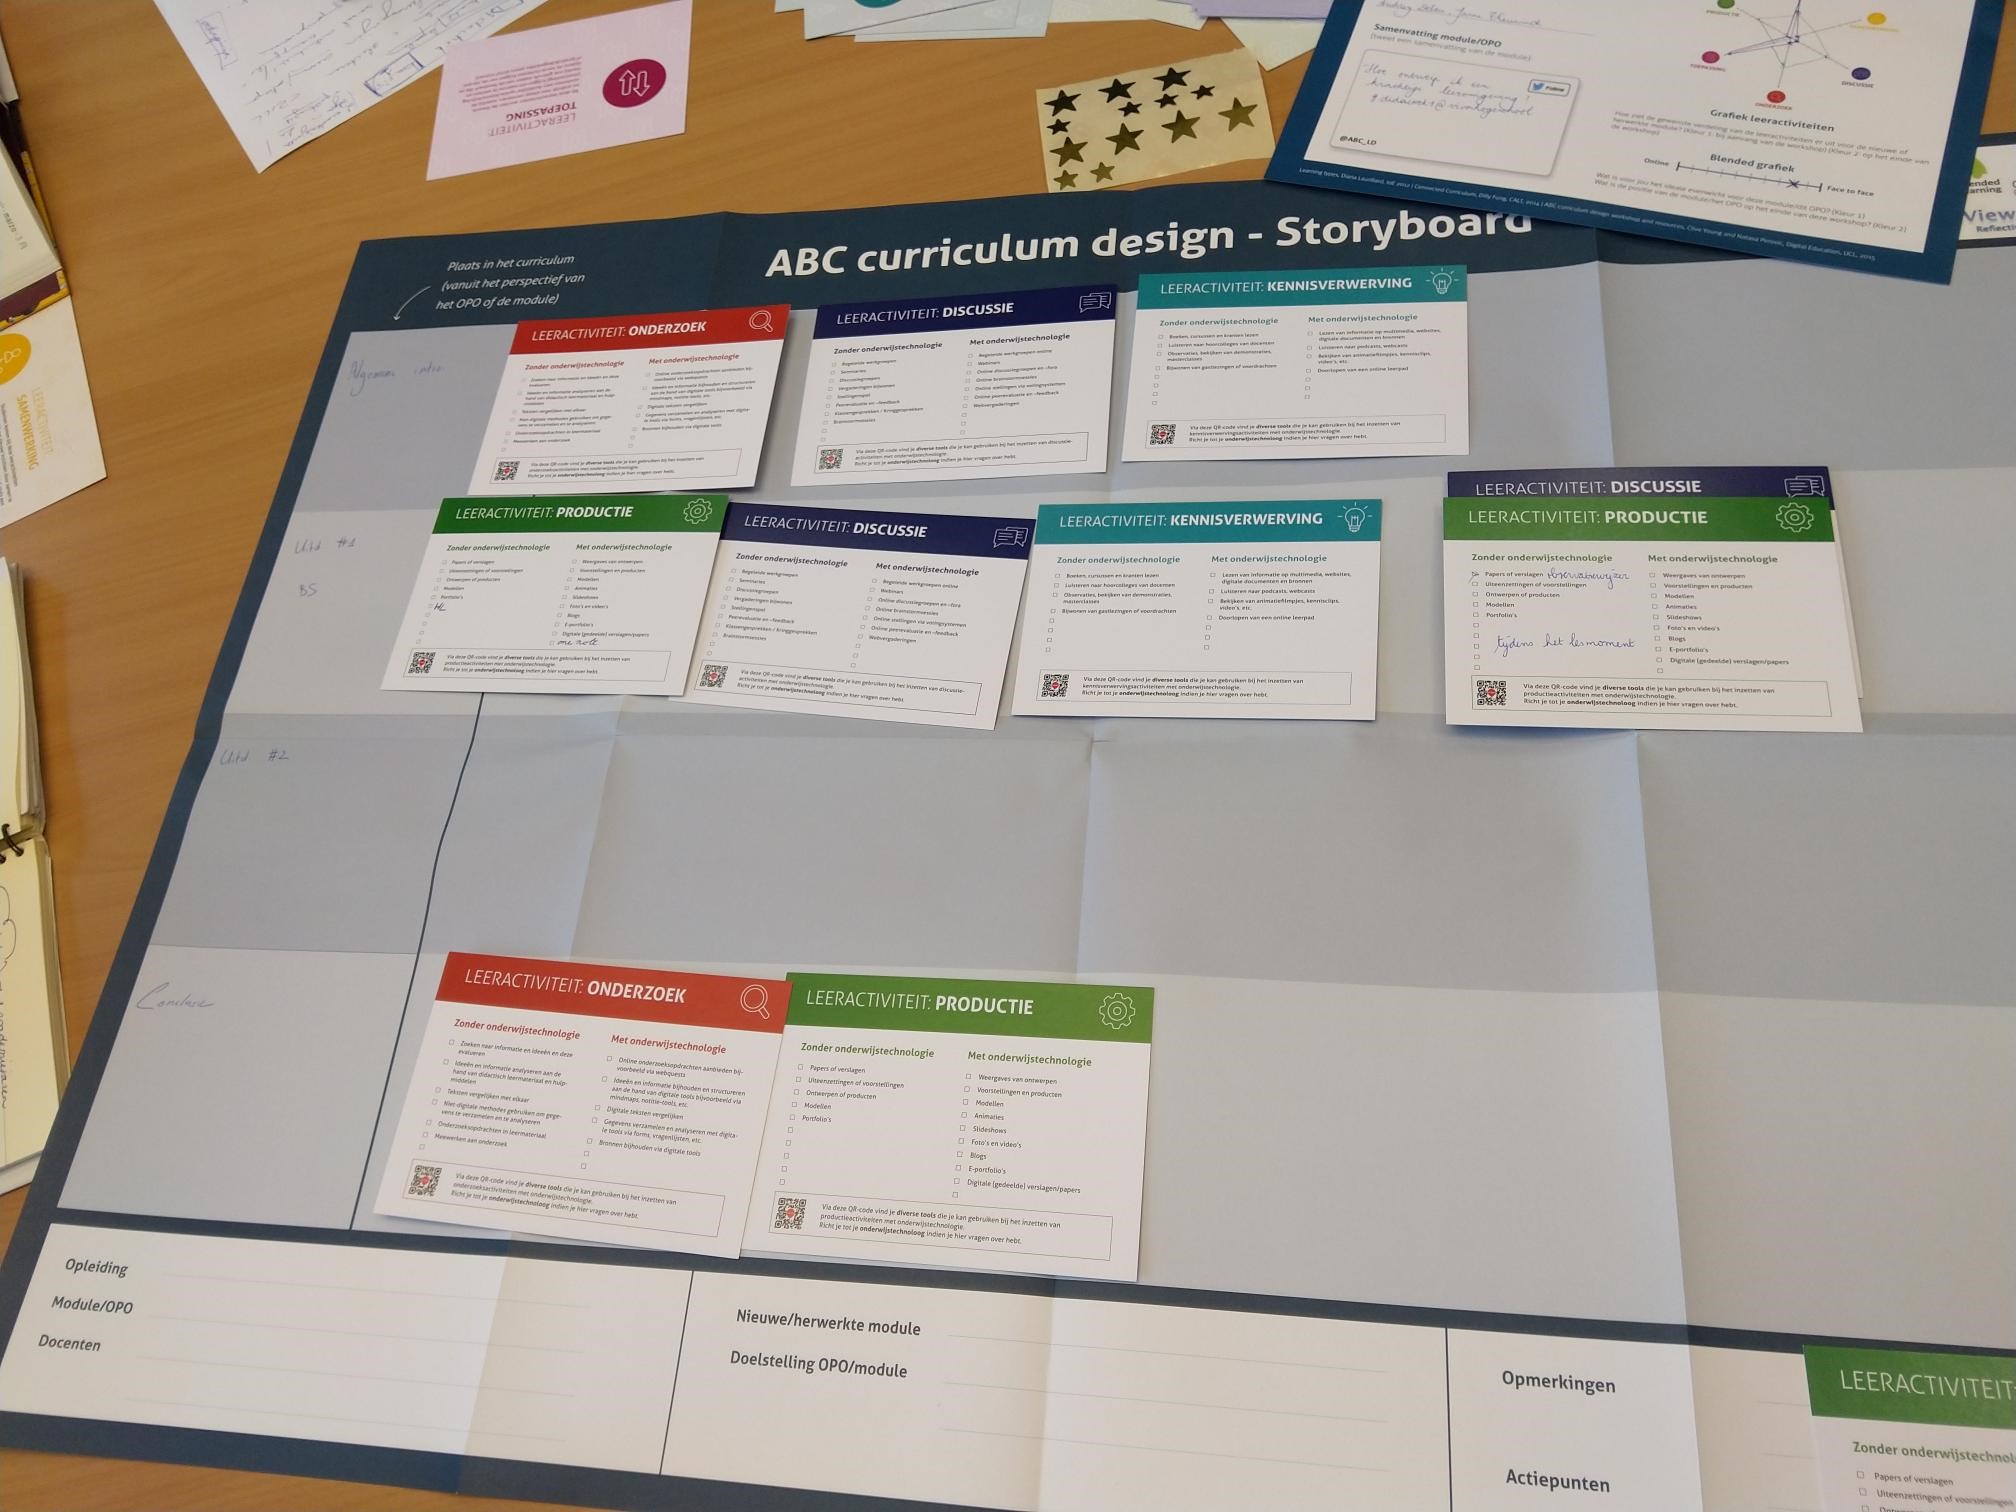
Each team then begins to turn over the cards and select the activities they want to run. For example, on the Acquistion card a tick might be put against ‘watching a pre-recorded bite sized lecture’. Where other ideas emerge, these are also noted on the back of the card. As each week or section is worked through a module storyboard begins to emerge. In some sections of the modules, several cards may overlap as they help to form a cohesive sequence of activities that involve several learning types. Additional details can be recorded on the cards such as:
- How long the activity should take the students to do
- Whether it’s something that the teacher is present for, or that the students do in their own time
- If they’re doing it individually, or as a group
- Whether it’s an activity that is going to be assessed (formatively or summatively)
By the end of the workshop a module team leave with a detailed storyboard that they can build on further and use to plan out what needs to be done to prepare for each teaching activity, and an estimate of the time they’ll need (be able…) to allocate to it.
Take a look at this video from Clive Young and Natsa Perovic from UCL who developed the ABC model. It gives an overview of the ABC approach that we’ve already covered in detail, but from 2.58 in they detail the storyboarding approach in the context of a degree course on population health and show you how this can be built up.
(Set to start at 2:58)
Over to you
Previously when we first looked at the ABC model we asked you to take a look at your module or teaching plan/timetable and begin to think about which learning types you already made use of. Let’s now take this a step further and begin to consider how you’re going to redesign your teaching for blended learning using the storyboarding approach detailed above. You already know what works well in your teaching and what students have found challenging. This is an opportunity to build on and address these aspects and begin to think through how you can translate what you do face-to-face to online.
You can do this storyboarding on paper and with post-it notes – and that’s probably fine if you’re designing your own module. However, if you prefer to work electronically, or you are working with others – there are other options that you can explore.
Tools to help storyboarding
Microsoft 365
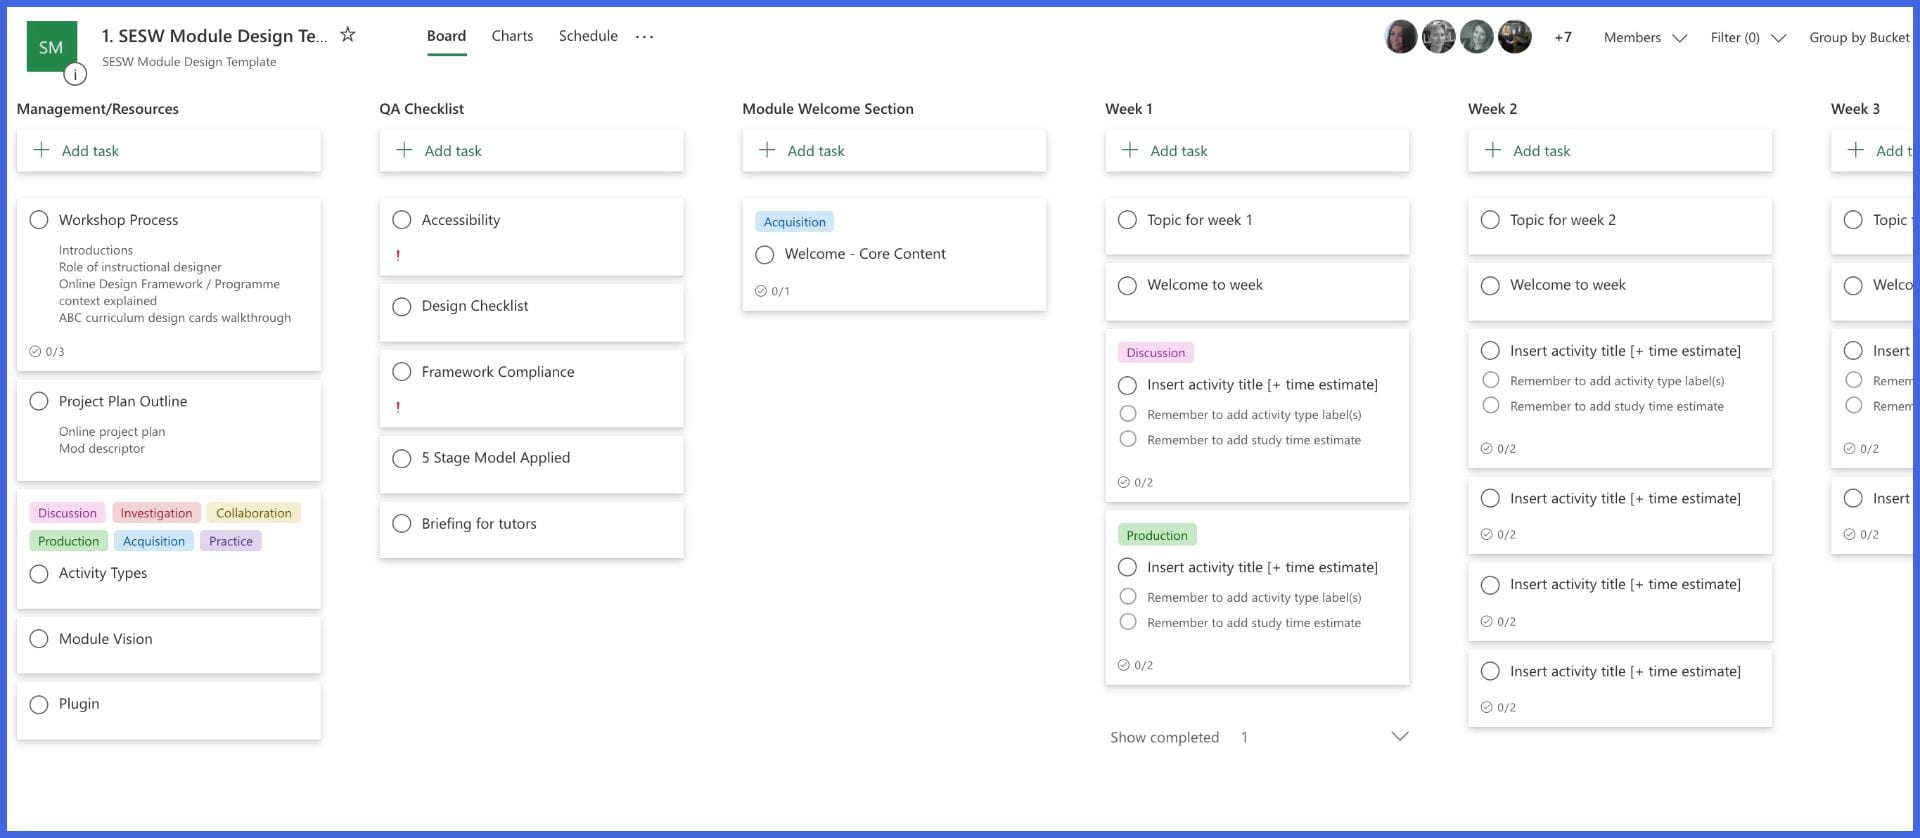
Planner. If you are used to the Planner in Microsoft 365, you could use it to start to plan things out. Helen Booth in Education has developed a shell plan. As it’s not possible to share a plan without sharing it to a team, contact Helen directly, or CTIL, to ask for a copy.
Word
Laurea University in Finland created a Word Document, though the original is no longer available online. We have developed a Dundee version based on theirs.
Padlet
We know that Padlet is a popular tool among Dundee staff. Glasgow Caledonian used Padlet to create a storyboard, and we have now created a Dundee version, as we’ve got a site licence for Padlet
Miro
A number of the MOOC teams at Dundee have used Miro, and we know that some departments are also investigating it for other purposes including as a collaborative online white board. Others have looked at Miro, and thought it a little too complex for their needs for this particular purpose. You should be aware that Miro poses some accessibility issues for those requiring screen-readers.
Learning Designer
UCL have developed an online tool to help you plan. It’s powerful, so takes a bit of time to get used to. We’d recommend starting with the browser, to see what others have done. You can then download ideas you think you may want to use. In the designer tab you can import – or just start to develop your own storyboard.
This has the advantage that, used properly, it will help you build up a spider diagram showing the amount of time that students are spending on each learning type, to help you ensure a good balance.
There are lots of other options too, Trello is another example as demonstrated by colleagues at Durham. The key really is to try a few out and see what works best for you and your team.
Bringing it all together
Once you’ve completed your module storyboard it’s time to refer the back to your completed worksheet from the start of this LearningX series. As you’ve worked through each week of your module/teaching you will have had an opportunity to reflect on the balance of the different learning types in your module and perhaps included more points for discussion, or collaborative mini activities than you would typically have used when teaching face to face. Take a look at your storyboard and remap the shape of your module on the worksheet in another colour. What does the balance of learning types look like now? If you have been working as part of a course team, it can be useful to look at several modules together, as often some modules tend more towards one learning type than another, so you may have the balance across several modules.
The Learning Designer tool will help you draw up that diagram, as you add in the time estimates for each activity, however, if you haven’t used that, you could use Excel.
As well as looking at the Learning Types, we have also thought about Constructive alignment, so the questions to ask yourself are “do the activities sufficiently prepare students for their assessments” and “do those assessments really allow you to ensure the learning outcomes have been met”. This can be very difficult, as no one actively designs learning materials to not support the intended learning outcomes and assessments, yet it’s a frequent complaint of students that they feel unprepared for the assessment. This can be a good time to involve others – does someone else – either someone in your team, or ideally from a different discipline think that the students have enough preparation for the assessments. You’ll note this is “preparing” not “teaching to the test” – it’s ensuring they’ve had the appropriate experiences to enable them to demonstrate the knowledge, skills and creativity required to meet the requirements of the Assessments
Getting more support
The ABC approach is best done as a team based workshop – whether that’s a group working on the same module, or a looser group of staff who’re teaching across a number of modules on a degree scheme.
If you’re working as a group, you might like to work through these posts together, and share your own ideas.
CTIL can become involved in several ways –
- Attending a short Q & A session with your team – to answer any questions you have after working through Blend Your Module.
- Run a workshop, once you’ve got familiar with the approach outlined here, to support you as you create the curriculum design.
- If you’re working through these ideas on your own, why not come along to a dropin session, and have a chat with a member of the CTIL team.
That’s a wrap
We hope that this Blend your Module Learning X series has helped you begin to think about how you can translate your teaching to a blended approach. As we wrap up this series the critical point we’d like to highlight is the importance of the module storyboarding process. Taking time to pause and think about how you can use the different learning types to create an active and engaging learning experience is important. It will also help you develop an action plan of what you need to do, for example what short video content you might need to create, what open resources you need to search for, etc. Once you start to create and gather your resources you’ll then be ready to start building your module in My Dundee. We’ll be running a Build your Module Learning X series in August to help you with this process. In the meantime if you need any help or support do be in touch.

Alexandra Mihai (Assistant Professor of Innovation in Higher Education @MaastrichtU) has written a blog post about storyboarding – including a lot of useful starting points. She’s looking more at storyboarding a particular session, but includes things we’ve spoken about here – such as estimating time taken for both the students & you, making sure the instructions are clear, etc.
https://educationalist.eu/whats-your-story-1e6a49633b3c