11: Signposting

Steve Krug - picture of book
Reading Time: 4 minutes

Introduction

Watch this video, to get an overview of Signposting [1:43]

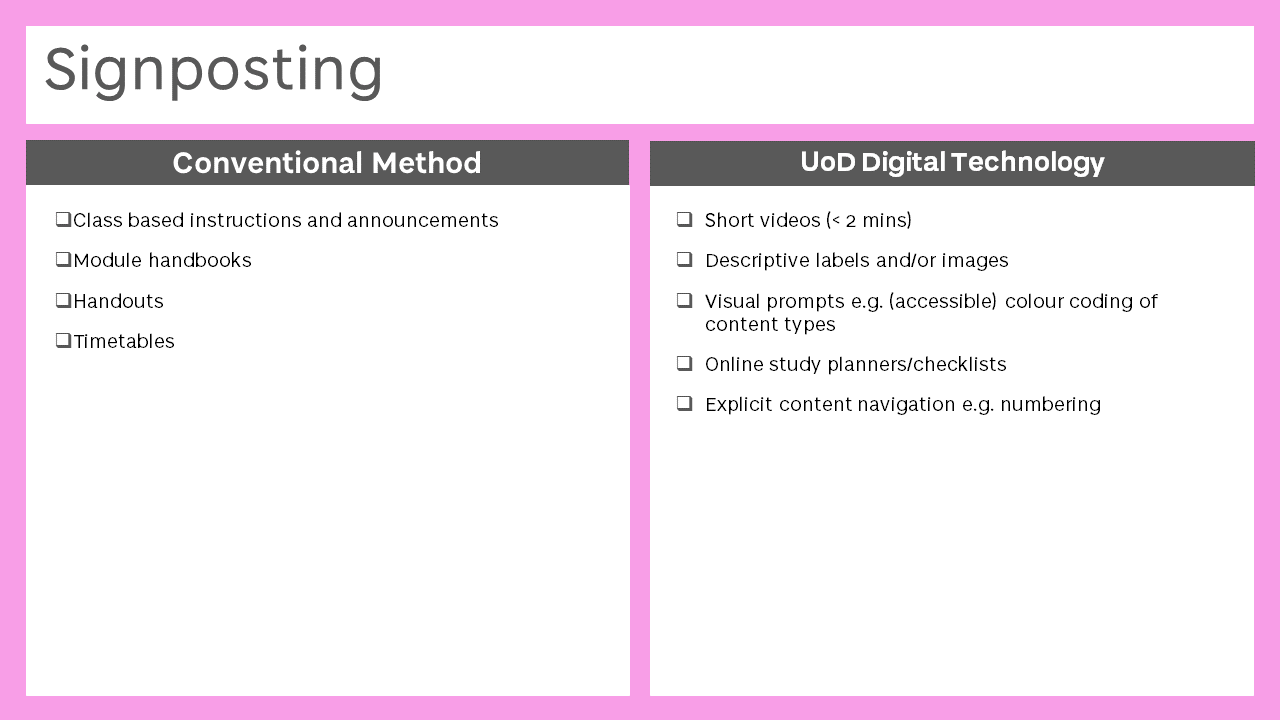
You’ll find the card at slides 17 and 18 in the full slide deck

Signposting Front of card
Signposting –  Front of card
Signposting Back of Card
Signposting – back of card

Moving Online

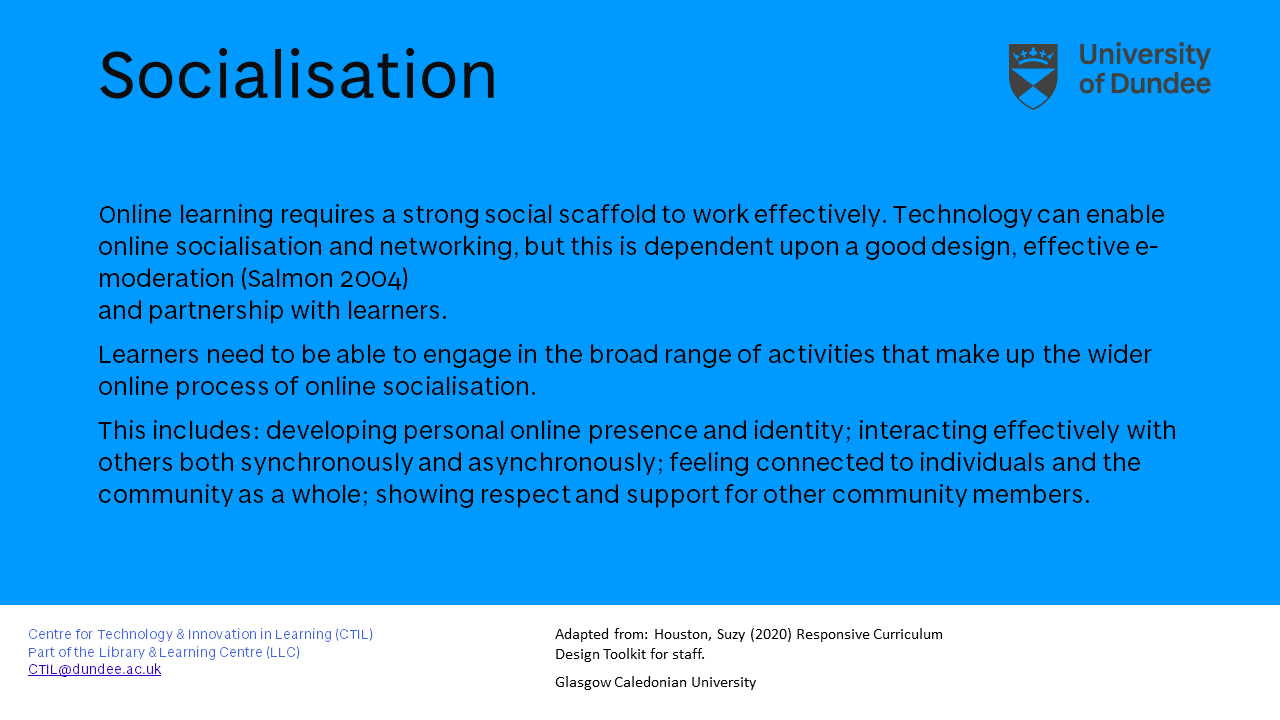
Signposting is all about making the student’s journey through their module as simple as possible with no barriers or pain points to distract them from their learning. As highlighted in Steve Krug’s web usability book “Don’t Make Me Think: A Common Sense Approach to Web Usability”

Steve Krug - picture of book

“Making every page or screen self-evident is like having good lighting in a store: it just makes everything seem better.” (Krug, 2017)

In the online, self-study, environment we want our students to understand ‘how they can progress through the module and how it all contributes to the overarching learning outcomes of the module’ (GCU Curriculum Design & Development Toolkit for Staff p18). This can be done in a simple way with some effective design principles these include:

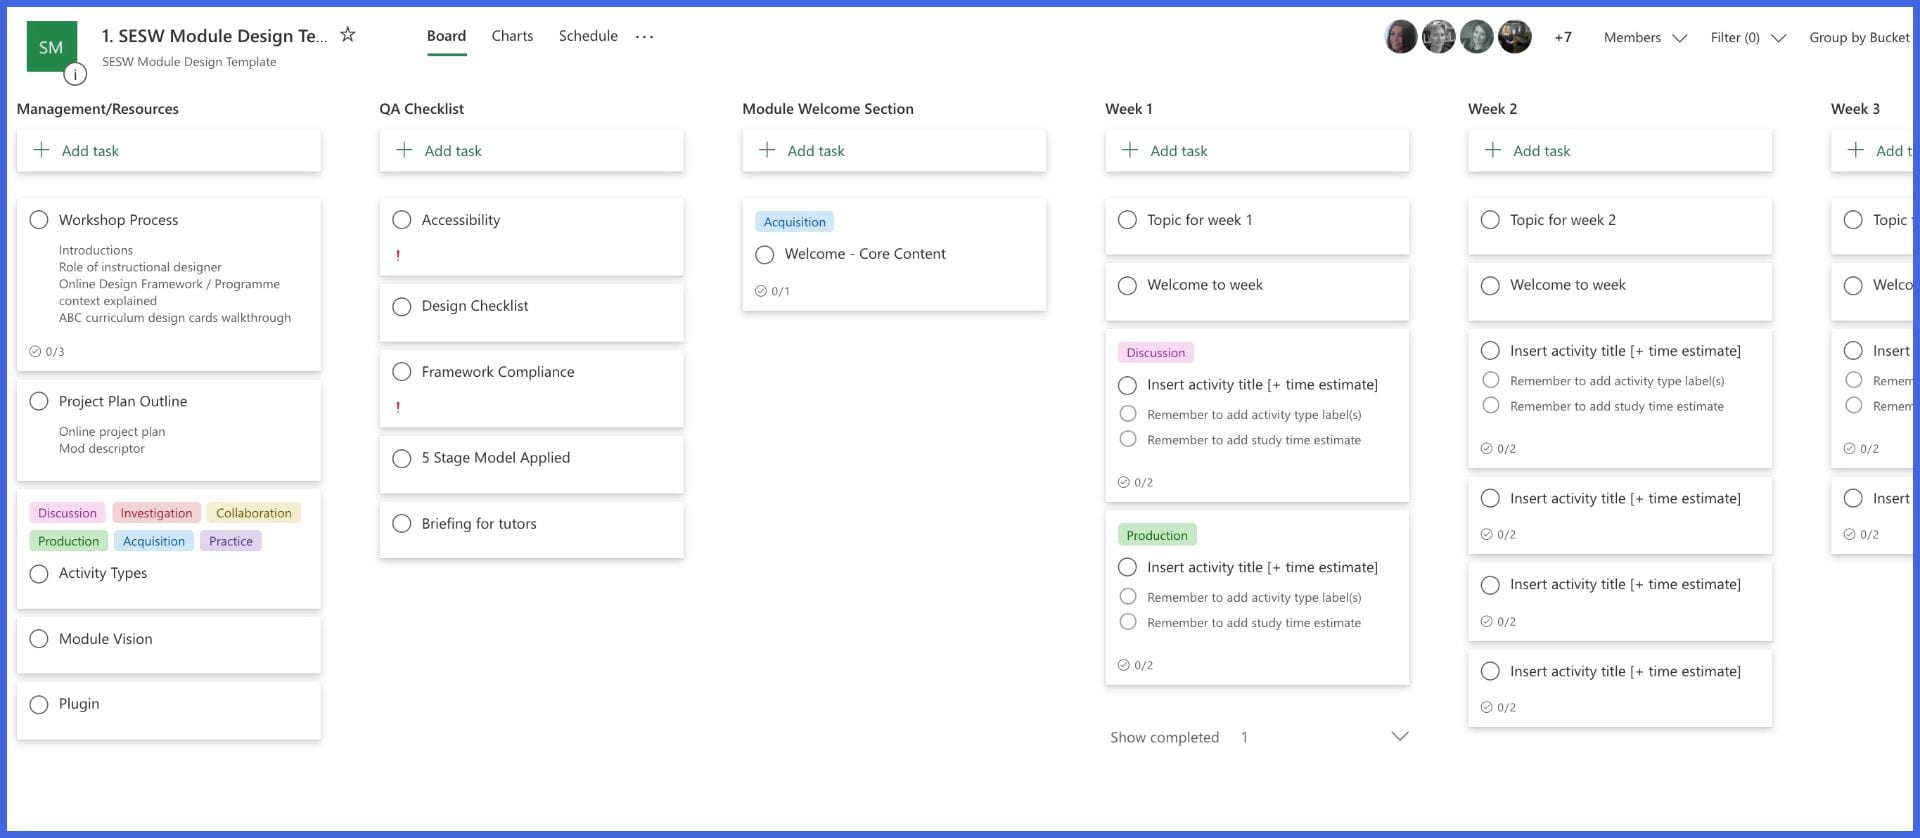
  • Break pages into clearly labelled, defined, manageable sections (as highlighted in Acquisition). This avoids the danger of information overload. For example content could be broken down by topic or a specific time frame (i.e. week 1, week 2..)
  • Numbering content – Using a hierarchical numbering convention helps identify user progress and location. (For example, if you chose to split by weeks you could have everything to be completed in week 3 given the heading 3.1 The Concept of …, 3.2 Reading material for, 3.3…)
  • Avoid nesting content. For example, clicking through multiple layers of folders to find the desired content. (Blackboard Ultra has limited the amount of file hierarchy to help avoid this practise).
  • Weekly study planners and checklists.
  • Provide clearly written learning goals and objectives, appropriate for the course level and aligned to the desired learning outcomes and module descriptors. [from UoD Module Framework]
  • Guide students through the sequence of learning activities and tasks that need to be completed. Make use of conditional (staged) release so that tasks are hidden until prerequisite tasks are completed, or until specific dates. [from UoD Module Framework]
  • Simplified language wherever possible.
  • Declutter text as much as possible, understanding that white space can be important to allow the student to focus.
  • Awareness of readability/accessibility.
  • Consistency of layout/labelling/numbering conventions.
  • Time stamps – useful to clearly show the amount of time required to complete a task in particular for audio and video. For example, 3.4 The Art of Making a Good Cup of Tea [1:44]

We all can get blinded by our own thought processes and lose sight of the student’s goals therefore it can be highly valuable to conduct usability tests. This does not need to be overly complicated and basically requires a fresh pair of eyes looking over your module. This could be a colleague or student however preferably it should be someone outside your area of expertise to make feedback more objective.

Blackboard Ultra – Signposting

One of the key features of Blackboard Ultra is accessibility. With the planned move from Blackboard Learn (current version) to Blackboard Ultra at a module level many of the signposting issues have been improved. A clean, simplified layout, consistent set of icons and accessible navigation structure (bringing key information to the top level) gives clear signposting to the students in an easy, intuitive way.

Blackboard Learn Ultra|video [1:55]

Over to you

In your exploration of other learning providers highlighted in the introduction (FutureLearn, Open University…). Or even your experience of online in general, shopping, researching…can you find some examples of where you thought signposting was effective and examples of when you found the signposting confusing or awkward? Share these examples in the comments box below.

  • Think about these examples and share in the comments box below how you could apply the principles to your own module design?
  • Think about how you want a student to progress through your module and think about it in terms of a journey. What is the journey you want your students to take? Think about what signposting techniques you could employ to facilitate them?
  • Conduct a quick usability test with one of your current modules and try to find insights on how a user interacts and identify possible pain points. Can you use signposting to alleviate these problems?
  • Think back to any module evaluations and feedback you have received in the past and consider whether better signposting could have helped address any issues raised. For example, signposting when a student is receiving feedback.
  • Finally, one of the most widely used forms of signposting can be the student Handbook, can you think of circumstances that the Handbook could be more valuable than delivering the information in smaller chunks?

Other Dundee resources

Blackboard Ally resource created by University of Dundee students Emma Tennant, Emily Turnbull and illustrations by Daisy Hutton.

Academic skills live smart & learn smart for students : Academic Skills Centre.

References

Houston, S. (no date) Curriculum Design and Development Toolkit for Staff. Glasgow Caledonian University (unpublished)

Krug, S., 2017. Don’t Make Me Think!. [Berkley]: New Riders.

Dundee Exemplary Module Framework 19 May 2020 Version 4

12. Socialisation

Reading Time: 4 minutes

Introduction

Next up is the topic Socialisation – listen to a podcast about what we’ll be covering.

You’ll find the Socialisation example on slides 15 and 16 in the full slide deck


For full text, please see the slide deck
Socialisation – front of card
For full text, see slide deck
Socialisation – back of card

Moving online

Social presence is one of the most significant factors in improving instructional effectiveness and building a sense of community. (Steven R. Aragon 2003).  As we increasingly rely on using virtual spaces and other online collaboration tools to communicate with our learners, it is crucial in your role and presence as an online tutor and e-moderator, to understand how the activities you develop may impact on your student’s social learning experience.  Socialisation with your students should begin at the start of all modules to set the scene and rhythm of your programme and not be viewed as something that only happens when doing induction with first year students.

The rapid increase in digital technologies (Moodle, Blackboard, Collaborate, Twitter …) has and continues to change and shape the way you can deliver your teaching.  Kop, Fournier, and Mak (2011) contend that “the structure of the learning environment, the place and presence of learners and educators within the institutional boundaries, and the nature of knowing and learning are all challenged by the fast pace of technological change” (p. 74).

We have all experienced situations in the physical space where we have had to socialise and interact with others, for example on the first day at university, starting a new job or attending a conference event.  In the physical space, we have developed and adopted over time approaches in observing social cues to deal with this form of social interaction (wait and observe, look for people who you think are similar to yourself, seek out people you might know etc).  When engaged in online interactions, these cues can be more ambiguous, thus requiring a different approach when moving to the online space. Tu & McIsaac (2002) and Aragon (2003) ‘place high importance in using engagement tactics, in online classrooms, geared towards increasing social presence and reducing distance’.

Transitioning to a more online blended learning format, requires your course to be an online ‘Place’ for learning and not just a ‘Space’ for learning.  Some tips on how to prepare for a more connected community of inquiry with your students are:

  • Communicate regularly: routinely maintain a consistent online presence by timetabling dedicated slots for discussion both formal and informal with students and other tutors. Use the MyDundee discussion forum to foster discussion and engagement. In episode 2 of this series: The Bigger Picture Emma discussed Universal Design for Learning.  You may find some of the tips there helpful when preparing your students for studying on your programme at a distance.
  • Personalised sessions: nothing beats the opportunity to have an open 1-on-1 (or small group) session with your tutor. Timetable these into your teaching schedule – it fosters that sense of belonging and community – have 1-on-1 sessions via Blackboard Collaborate.
  • Create an environment of trust, humanity and warmth: Introduce and speak about yourself and likewise ask your students to introduce themselves. Use the MyDundee forum to start this and then perhaps move towards a more virtual face-2-face discussion using Blackboard Collaborate when your students feel more relaxed.
  • Establish ground rules: Do not assume your students know the rules of engagement when interacting online with you and your programme, clear guidance at the outset about how they behave when in a virtual place will help to set expectations about appropriate behaviours  – this has been covered in more detail in the Digital Wellbeing  and Safety episode last week.
  • Motivate your students: Think of ways to motivate your students. If you run online discussion forums, students can be assessed on their level of contribution and engagement. Think about your activities and how you can add-in ‘fun’ quizzes to supplement these activities.
  • Seek Feedback: Feedback provides a constructive way that can help you develop your teaching practice and move your students learning forward. Ask for feedback on how the teaching is going – this will help you to review and make changes in the early stages of your teaching.

Over to you

I hope you have enjoyed this discussion topic.  Below are some questions to think about and discuss/share with your colleagues in relation to ‘Socialisation’ in learning and teaching (use the comments option box below 😉 ).

  • Have you taken any online courses or attended online workshops yourself? What were the most engaging and enjoyable features and how might you employ those in your own practice?
  • What ice-breakers do you typically use with your students in the classroom and how might those translate into online activities?
  • What’s your favourite online communication tool and why?
  • What approaches might you consider when you design your online activities, to ensure students have an equal opportunity to contribute?

Other Dundee Resources

If you want to get your students to engage with you and each other online, why not post a weekly topic for discussion on your MyDundee module forum and gamify it by giving points for contribution and engagement.  A colleague from the Medical School introduced this to year the 4 General Surgery block (whilst on secondment in New Zealand!) and it has proved to be very successful.

There has been many other useful information and resources posted during this Blend Your Module series by other CTIL colleagues which you can dip in and out of any time – and comment on.

References/Further Reading

13: What next?

Screenshot of MS Planner
Reading Time: 6 minutes

Introduction

As we outlined previously the ABC design approach normally runs as a workshop and after the model and the learning types have been introduced and discussed participants begin to turn their attention to the design of their own modules.

So now that you’ve worked through this Learning X series and taken time to reflect on the various learning types, and perhaps also explored some FutureLearn or OpenLearn courses, the next step is to apply your thinking to the design of your own module and teaching. An effective way to approach this is to storyboard your module using the learning types.

At the start we introduced the idea of “cards”, and you’ll see that these have been a key feature across the series and helped us to present the learning types. You’ll also hopefully have downloaded the full set of cards as a PowerPoint file.

If we were running an ABC workshop on campus, once the Learning Types had been introduced and discussed, we’d ask participants to break into small groups (e.g programme or module team) to discuss the different activities they will be using across the whole lifecycle of a module. The teams take a large module planning sheet that’s divided into rows with each row representing a week or a section of the module. As they begin to review and consider the teaching, they begin to identify which learning types can be best applied to help students achieve the desired learning outcomes. The appropriate learning type cards are then sequenced on the module planning sheet to present the overall design of the module.

A large sheet of paper, with ABC learning design cards on.
Example of workshop – image from ABC-LD.org (Source: https://abc-ld.org/wp-content/uploads/2019/11/storyboard-janne-en-audrey.jpg)

Each team then begins to turn over the cards and select the activities they want to run. For example, on the Acquistion card a tick might be put against ‘watching a pre-recorded bite sized lecture’. Where other ideas emerge, these are also noted on the back of the card. As each week or section is worked through a module storyboard begins to emerge. In some sections of the modules, several cards may overlap as they help to form a cohesive sequence of activities that involve several learning types. Additional details can be recorded on the cards such as:

  • How long the activity should take the students to do
  • Whether it’s something that the teacher is present for, or that the students do in their own time
  • If they’re doing it individually, or as a group
  • Whether it’s an activity that is going to be assessed (formatively or summatively)

By the end of the workshop a module team leave with a detailed storyboard that they can build on further and use to plan out what needs to be done to prepare for each teaching activity, and an estimate of the time they’ll need (be able…) to allocate to it.

Take a look at this video from Clive Young and Natsa Perovic from UCL who developed the ABC model. It gives an overview of the ABC approach that we’ve already covered in detail, but from 2.58 in they detail the storyboarding approach in the context of a degree course on population health and show you how this can be built up.

(Set to start at 2:58)

Over to you

Previously when we first looked at the ABC model we asked you to take a look at your module or teaching plan/timetable and begin to think about which learning types you already made use of. Let’s now take this a step further and begin to consider how you’re going to redesign your teaching for blended learning using the storyboarding approach detailed above. You already know what works well in your teaching and what students have found challenging. This is an opportunity to build on and address these aspects and begin to think through how you can translate what you do face-to-face to online.

You can do this storyboarding on paper and with post-it notes – and that’s probably fine if you’re designing your own module. However, if you prefer to work electronically, or you are working with others – there are other options that you can explore.

Tools to help storyboarding

Microsoft 365

Planner. If you are used to the Planner in Microsoft 365, you could use it to start to plan things out. Helen Booth in Education has developed a shell plan. As it’s not possible to share a plan without sharing it to a team, contact Helen directly, or CTIL, to ask for a copy.

Screenshot of MS Planner
The outline planner used in ESW

Word

Laurea University in Finland created a Word Document, though the original is no longer available online. We have developed a Dundee version based on theirs.

Padlet

We know that Padlet is a popular tool among Dundee staff. Glasgow Caledonian used Padlet to create a storyboard, and we have now created a Dundee version, as we’ve got a site licence for Padlet

Miro

A number of the MOOC teams at Dundee have used Miro, and we know that some departments are also investigating it for other purposes including as a collaborative online white board. Others have looked at Miro, and thought it a little too complex for their needs for this particular purpose. You should be aware that Miro poses some accessibility issues for those requiring screen-readers.

Learning Designer

UCL have developed an online tool to help you plan. It’s powerful, so takes a bit of time to get used to. We’d recommend starting with the browser, to see what others have done. You can then download ideas you think you may want to use. In the designer tab you can import – or just start to develop your own storyboard.

This has the advantage that, used properly, it will help you build up a spider diagram showing the amount of time that students are spending on each learning type, to help you ensure a good balance.

There are lots of other options too, Trello is another example as demonstrated by colleagues at Durham. The key really is to try a few out and see what works best for you and your team.

Bringing it all together

Once you’ve completed your module storyboard it’s time to refer the back to your completed worksheet from the start of this LearningX series. As you’ve worked through each week of your module/teaching you will have had an opportunity to reflect on the balance of the different learning types in your module and perhaps included more points for discussion, or collaborative mini activities than you would typically have used when teaching face to face. Take a look at your storyboard and remap the shape of your module on the worksheet in another colour. What does the balance of learning types look like now? If you have been working as part of a course team, it can be useful to look at several modules together, as often some modules tend more towards one learning type than another, so you may have the balance across several modules.

The Learning Designer tool will help you draw up that diagram, as you add in the time estimates for each activity, however, if you haven’t used that, you could use Excel. 

As well as looking at the Learning Types, we have also thought about Constructive alignment, so the questions to ask yourself are “do the activities sufficiently prepare students for their assessments” and “do those assessments really allow you to ensure the learning outcomes have been met”. This can be very difficult, as no one actively designs learning materials to not support the intended learning outcomes and assessments, yet it’s a frequent complaint of students that they feel unprepared for the assessment.  This can be a good time to involve others – does someone else – either someone in your team, or ideally from a different discipline think that the students have enough preparation for the assessments. You’ll note this is “preparing” not “teaching to the test” – it’s ensuring they’ve had the appropriate experiences to enable them to demonstrate the knowledge, skills and creativity required to meet the requirements of the Assessments

Getting more support

The ABC approach is best done as a team based workshop – whether that’s a group working on the same module, or a looser group of staff who’re teaching across a number of modules on a degree scheme.

If you’re working as a group, you might like to work through these posts together, and share your own ideas.

CTIL can become involved in several ways –

  • Attending a short Q & A session with your team – to answer any questions you have after working through Blend Your Module.
  • Run a workshop, once you’ve got familiar with the approach outlined here, to support you as you create the curriculum design.
  • If you’re working through these ideas on your own, why not come along to a dropin session, and have a chat with a member of the CTIL team.

That’s a wrap

We hope that this Blend your Module Learning X series has helped you begin to think about how you can translate your teaching to a blended approach. As we wrap up this series the critical point we’d like to highlight is the importance of the module storyboarding process. Taking time to pause and think about how you can use the different learning types to create an active and engaging learning experience is important. It will also help you develop an action plan of what you need to do, for example what short video content you might need to create, what open resources you need to search for, etc. Once you start to create and gather your resources you’ll then be ready to start building your module in My Dundee. We’ll be running a Build your Module Learning X series in August to help you with this process. In the meantime if you need any help or support do be in touch.