Reading Time: < 1minutesSelfie – shared on Pixabay with a CC0 licence
In this Learning X, we’re looking at innovation in assessment. We’ll be looking at ideas for staff to use various technologies to support innovative approaches to assessment. For example, if you already get your students to write a reflective piece – how about getting them to reflect on video? Or perhaps you might get them to engage in a group blog, rather than writing a group report.
We’ll run from Feb 5th to 9th – there will be a post a day.
We will also have 2 live sessions – when you can meet others and share ideas on innovation in assessment. These are both in the Strawberry Bank Ideas lab:
This week, we will be looking at innovative approaches to assessment – particularly (though not exclusively) those involving technology.
Many staff are already starting to use tools such as Turnitin, Questionmark and My Dundee’s assignment tool for online submission / grading, but this week we’ll be looking at other tools, both those that we have within the University, perhaps in ways that you may not have used them before, and other freely available tools.
The plan for the week is :
Tuesday – individual students. For example, could we replace a written reflection with a video reflection.
Wednesday – group assessements. For example, creating a group blog – rather than a shared written report.
Thursday – whole class. For example, creating a wiki page not an essay; however, as it’s a wiki, all students can see what others have done.
Friday – how can we involve students. For example, peer evaluations of assessment artefacts.
There will, of course, be overlaps between all of these!
To start, though, what experiences do you have with anything that you feel is an innovative use of technology in assessment. It doesn’t matter if others have already tried it – we’re looking at what’s an innovation to you. Are there barriers in place to you implementing ideas you’ve read about elsewhere?
You may find the following article useful to get a broader view of the issues.
Bennett, S., Dawson, P., Bearman, M., Molloy, E., & Boud, D. (2017). How technology shapes assessment design: Findings from a study of university teachers: How technology shapes assessment design. British Journal of Educational Technology, 48(2), 672–682. https://doi.org/10.1111/bjet.12439
Do you know of others you could share with this group?
Yesterday, we asked you to start looking at innovation in assessment – to think about ideas you’ve read about / have tested yourself.
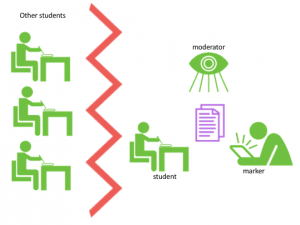
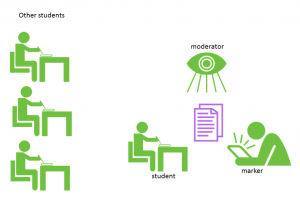
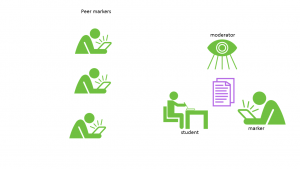
The most common assessment model is one where 1 student creates the work, for a primary audience of 1 (the marker) – and a secondary audience of the moderator/external/etc. Other students are very firmly excluded from the audience.
While we’ll look at wider audiences later in the week, today we’re considering this model – a very standard experience on the part of staff and student.
Students can’t see what others have created. (Created using images from the Noun Project)
Rather than looking alternative models to this – we’ll look at innovative ways for students create and present the assignment.
ePortfolios
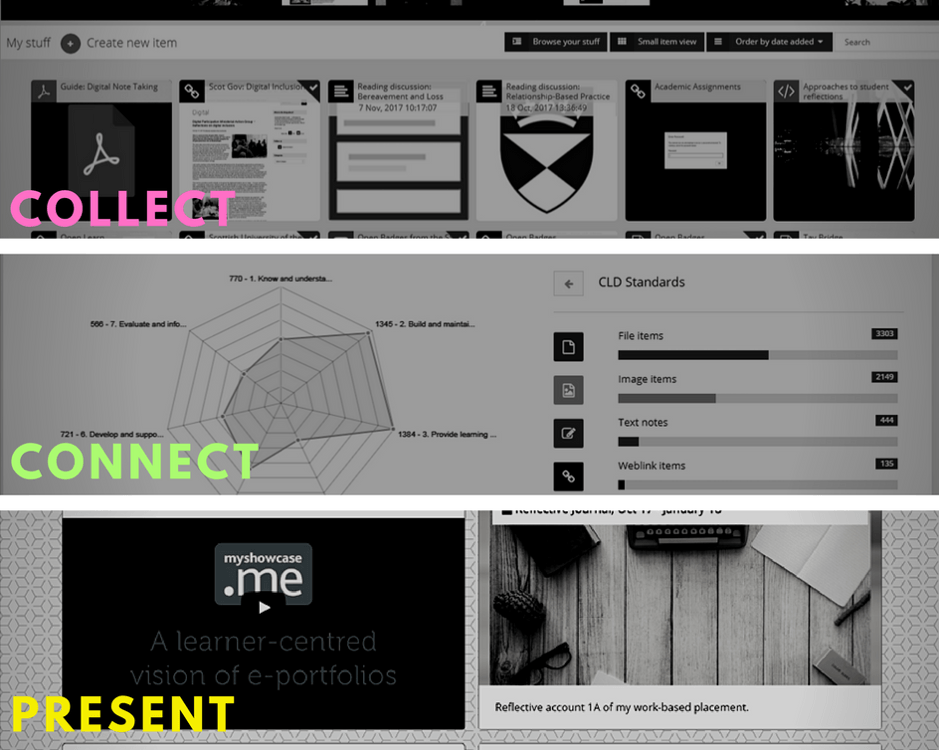
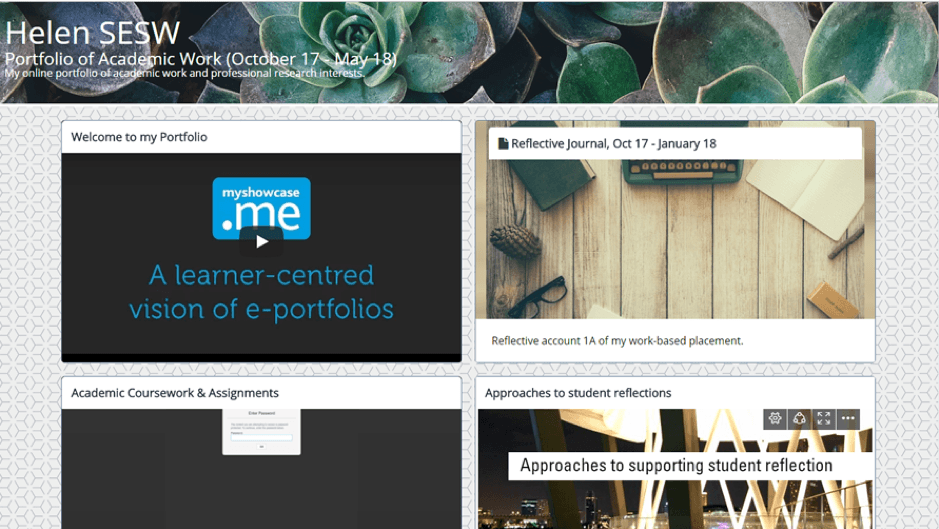
In the School of Education and Social work, staff have made extensive use of a tool called MyShowcase.me Helen Booth describes the tool.
“Myshowcase.me is an e-portfolio tool that provides students with a personal online learning space to store academic coursework and to collect and curate digitised artefacts and map evidences of their learning to professional standards frameworks. Community Learning and Development and Social Work students are formatively assessed to demonstrate their learning as they progress allowing them to build up evidence incrementally in their portfolios to ensure continuous learning occurs until submitted for final review.
Students are expected to think about the evidence and processes for constructing an e-portfolio and the reasons they were chosen and identify what they have learned. This process includes:
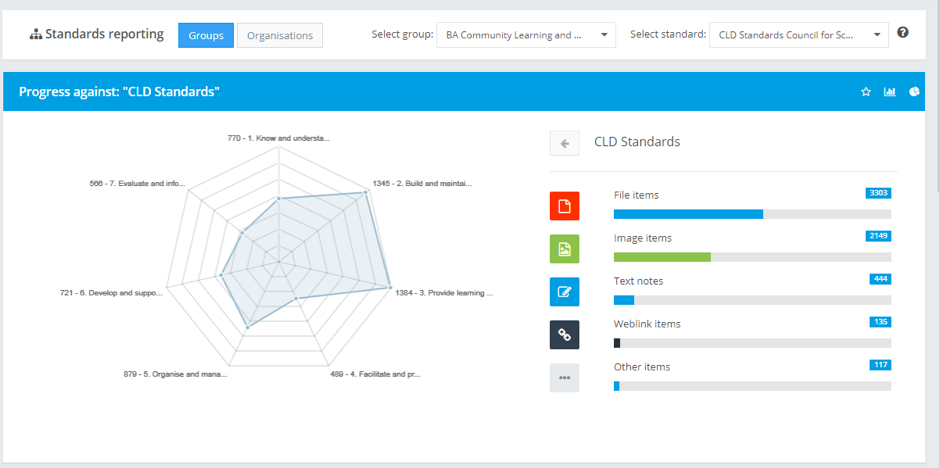
There are a range of tools and resources for developing, organising, and sharing materials (curation of documents, images, web-based apps, and recording video) to capture activities to help support students think independently to shape the process and development of their e-portfolio. Evidence brought into the e-portfolio can be tagged and mapped against a competency-based framework criterion, e.g. CLD Standards Council for Scotland and SSSC Codes of Practice to monitor their own progress and learning.
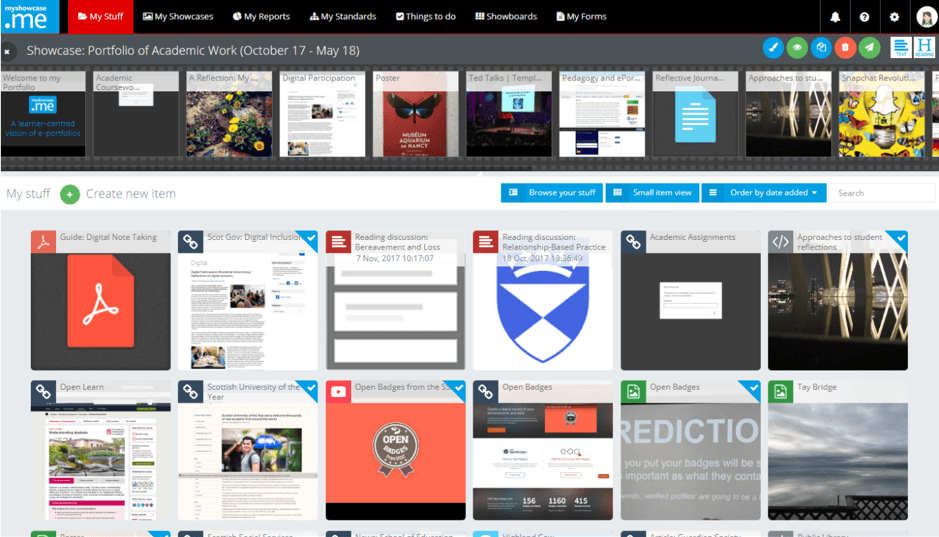
The submitted e-portfolio is a simple web page with an overview commentary and links to digitised evidence-based artefacts. This is an additional advantage for reviewers being able to provide feedback and comment. Students own and have personal control of Myshowcase.me and can take their portfolio of academic work with them after they graduate supporting employment opportunities and lifelong learning.”
1
An overview of MyShowcase
2
Choosing the type of evidence to embed.
3
A student’s evidence.
4
Collating the evidence to tell the story.
5
The markers’ view – how well is this student doing?
Audio / Video reflection
While the example above looks at creating a whole ePortfolio, we have many courses that ask students to write reflective pieces. For many students reflecting generally is difficult. If we then add to that the need to structure it into a written item, it can be very daunting for students.
There is, therefore, a move towards allowing students to reflect on camera – it’s not a new idea, Hansen (1990) suggests the idea of “self analysis”. Today, we have many tools that enable easy video creation – most students have 1 in their pocket.
On campus, we now have Panopto, which allows both audio and video to be captured and/or uploaded. Students could create audio or video sections, and add the URL either to a longer written section, or use it for the whole reflection. If you’re interested in finding out more about this tool, contact us.
References:
Hansen, E. (1990). The Role of Interactive Video Technology in Higher Education: Case Study and a Proposed Framework. Educational Technology,30(9), 13-21. Retrieved from http://www.jstor.org/stable/44427470
Yesterday, we thought about tools that can allow individuals to present their work in varied ways; when we start to think about groups, it becomes the way they communicate between themselves. We’re still thinking about the type of model where work is private to the particular group (tomorrow, we’ll be starting to think about opening up student work to other students).
Groups can’t see what other groups have created.
While group work has been used extensively for many years, staff have not always known what tools to encourage students to use when working as a group, as they’re creating / presenting the work.
We have a number of options in My Dundee – for example, did you know you can set up groups giving students a range of tools to use – you can also allow them to create their own study group using the tools in My Dundee. Or perhaps you could set up a collaborate room for each group.
Away from My Dundee, we have access to other tools that will allow students to work together. One suite of tools that people often forget are those we get through Office 365. If you’re not sure about the tools we have on campus, go to webmail, then click on the top left icon (looks like a lot of squares). For example, you might want students to generate a single report as a group, in which case Word will help them all collaborate on the same document. Or you may prefer to get them to use the group features of Office 365, which include a group OneNote notebook. This could even be the deliverable, if the structure of the report lends itself to this type of presentation. Most students are familiar with Word, so usually Word Online easy to adapt to; but for OneNote Lynda training sessions can be useful. (Need to be logged into the Universities systems to access Lynda)
“Student study group UBC Library” flickr photo by UBC Library shared under a Creative Commons (BY-NC-ND) license
One key issue with groups is the marking, and the allocation of marks. There are a number of tools that will allow group members to evaluate others performance – some in the medical school are using iPeer. I have also used a simple form in the past to allow students to evaluate each others contributions to the overall project – though then I had to do the sums, so though it worked well with a small number of groups, it would have been far more difficult with a larger group.
What have you tried? If you’d like any more information on the tools mentioned, just contact us in CTIL
Over the last 2 days, we’ve looked at the typical type of assessment, in that the only audience for the work are the marker and the moderator. However, in most workplaces, there’s an expectation that a wide range of people will see individuals outputs, whatever they are. In some subjects, this is already done extensively; many have peer audiences for presentations, creative arts often have critiques in which the whole group participates, but for written work, it’s far less common to allow others to see the outputs.
Students can see what others have created. (Created using images from the Noun Project)
While we could use a tool such as OneDrive to allow students to read others’ work, the process of having to download, open and then read, can be daunting.
So what about a wiki? Each student can have a page, but it’s easy to see (and link to) others pages. We have some staff on campus who are already using this with the CampusPack tool in My Dundee, and it’s ongoing, so students can see work from both their own class, and previous classes. It would also be possible, with the CampusPress pilot we currently have, to not only allow the students on the module to see the wiki, but you could, should you choose, allow the whole University, or even the world to see the students work. Clearly, allowing work to be visible outside the university can be daunting for some students and staff, but it can also be an important aspect of enhancing their digital literacy and competencies.
While a CampusPress blog would allow others to see, they may well not find it, so, how about the idea of getting students to update Wikipedia?
Clearly, working with Wikipedia articles requires a lot of support to help the students develop best practice – Wikipedia has a page of useful pointers, including various examples from Law, Latin American studies, and others.
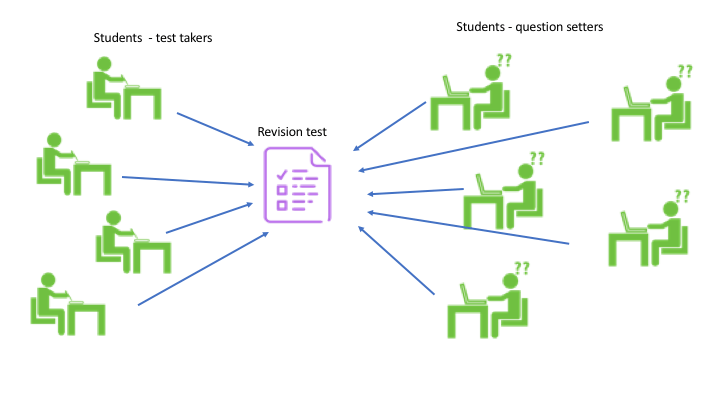
Yesterday, we looked at allowing students to see what others have created for their assignment – how about extending this to getting students to set quiz questions for each other –
An evidence-based strategy that promotes retention of taught material and fosters understanding of material is retrieval practice. Retrieval practice means that students actively bring information to mind – without looking at their notes. The idea it to test oneself on a regular basis on previously-taught material. Frequent quizzing is the key for long-term retention of knowledge. Engaging in retrieval practice shows what you know and what you still have not mastered. However, it is much more than that: Successfully retrieving information strengthens the memory of that information! It is a real memory booster – so to say. One way for lecturers to make use of this strategy is to include in-class quizzes and have students generate answers. Another way is to provide students with practice questions that they can work on at home. But there is yet another option that I have explored last semester in one of my classes: Student-generated questions.
At the end of the semester and before the final exam, I tasked the students with a challenge: To create two questions per lecture and submit them the following week. The key here is that students should already have prior knowledge of the material. It is impossible to generate good questions, if you don’t have a basic understanding of the material. Thus, giving students the question-generating task after having provided input, is a good idea. Students submitted their questions through Assignments on MyDundee as a Word document. The challenge component was that if more than 50% of the class submitted their questions, I would release all questions to them (alongside my questions).
This requirement was imposed as an incentive and out of fairness. First, it would be unfair to make student questions available for everyone, if only a few students are doing the hard work. Second, I wanted as many students as possible to engage with the task. For sure this challenge component made a huge difference: Compared to the year before, where only 2 (!) out of 100 students submitted questions, this year 27 out of 106 students submitted their questions. Many of the student-generated questions were brilliant – clearly showing that they have obtained a good understanding of the material. Unfortunately, still not enough students contributed to take advantage of getting access to the large pool of questions, but more students engaged with the task.
Still, I wanted all students to benefit from having good practice questions. For that reason, I made representative questions (questions generated by many students) available to them during my revision lecture.
Possible improvements for the future:
Use a better way to collect the questions. Is there a good free software that can support this strategy?
Prepare students during the semester. Explain to them that generating questions should be a weekly revision activity. This way they are already using this strategy continuously during the semester.
Find a way for students to work collaboratively on the questions, swapping questions, and – most importantly – generating answers and give each other feedback. Again, is there a software that can support this in a smooth and nonintrusive way?
In part 2 of today’s post, we’ll look at getting students to peer mark each other, and how they might look at developing their own grading criteria.
In part 1 of today’s post, we thought about encouraging students to develop quiz questions. Yesterday, we looked at allowing students to see what others have created for their assignment – but what about extending this to allow (require!) peer marking, or perhaps getting students to start looking at how they’ll be graded.
Students reviewing/marking others have created. (Created using images from the Noun Project)
We have a number of tools that will allow peer (and self) marking – both VLEs in use (My Dundee and Moodle) have this feature, as does Turnitin.
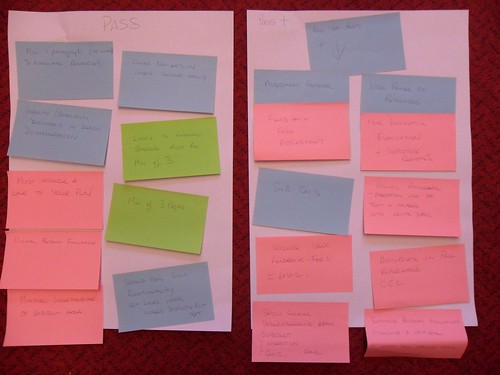
However, the next stage would be to get the students co-create the marking schema. As with all activities that are new for students, it can take time; I have done it a number of times, and each time we needed a lot of preparation time to get the students to understand what they had to do. What was particularly interesting to me was how little the students understood phrases in standard marking criteria that were used in other courses. The highest tech, though, that I ever got to for agreeing the criteria was the invaluable PostIt!
Have you had other ideas for involving students in the assessment process?
Further reading:
Meer, N., & Chapman, A. (2014). Co-creation of Marking Criteria: Students as Partners in the Assessment Process. Business and Management Education in HE, 1–15. https://doi.org/10.11120/bmhe.2014.00008
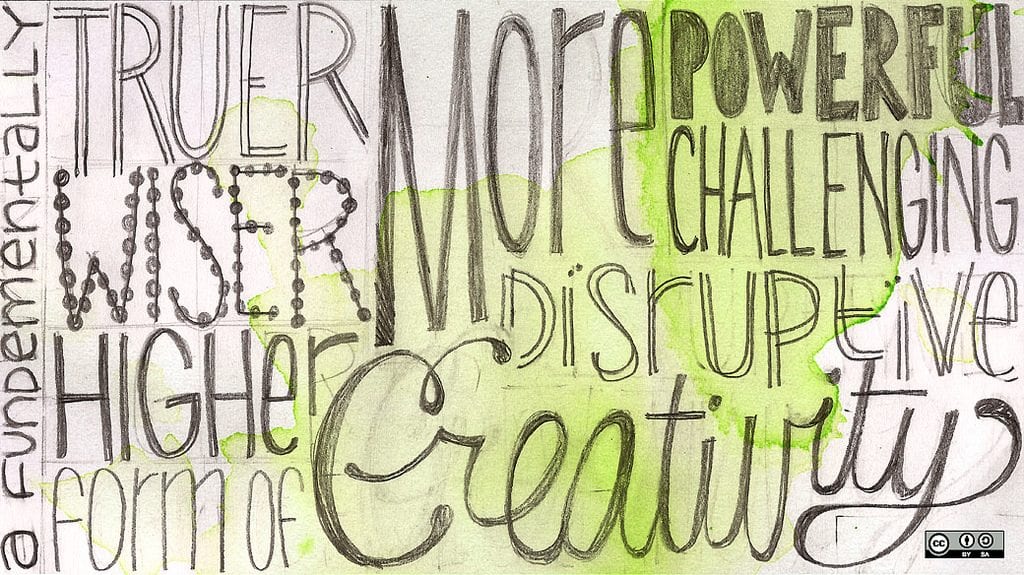
Next week, we’ll be joining in with #creativeHE. It’s a group of educators who look at creative ideas for Learning & Teaching in HE. It’s grown from Manchester Metropolitan University’s PGCert, and now it operates as a community and discussion space to enable wider discussions and collaborations.
To get an idea of what’s happened in the past, have a look at the Google Plus page that’s used as a hub. If you want to join in on their site, you’ll need to have a Google account – and you don’t want to have to also create a gmail address, you can use your own email address
You might also find the BYOD4L group – which has their online event this week useful to start to whet your appetite.
We have 2 live sessions planned to accompany #creativeHE.
In each, we’ll make time for people to speak about ideas they’ve had as a result of the activities they’ve done so far in the session = and start to develop networks across the University that you may find useful for gathering more ideas. Given the nature of these sessions, we’ll make them a drop in sessions, so come for as long or as short as you want.
We’ll meet in the Strawberry bank ideas lab – I’ve got it booked from 2-4, but, rather than using the whole room, we’ll just use the two tables at the right hand end as you enter (i.e. where the main display is) – unless there are lots of people – in which case we can spread!
Reading Time: < 1minutesShared on Pixabay with a CC0 licence.
Today’s #creativeHE activity is to design a game to help students with induction.
If you caught the announcement they made on Friday (I’m afraid I didn’t) you’ll see they suggested that you collect lots of (clean) recycling.
For the rest of the week, the outline (shared in Friday’s post) is
Day 1 Creative induction, introductions: belonging
Day 2 Spicing up learning in the classroom (campus-based, blended and fully online)
Day 3 Extending creative learning outside the classroom
Day 4 Assessment and feedback that works (better)?
Day 5 Reflecting on the week and moving forward.
Feel free to share your ideas for induction – maybe thinking about what creative ideas you could bring in to expand what you currently do; perhaps you might even get an idea from reading others’ comments on how we might use the recycling materials!
Alternatively, do the suggested texts give you ideas for other game based activities in your teaching?
If you are a student, what information do you wish you’d been told in induction week? Which bits of information could have been left till a bit later in the term? Could you think of a playful way to introduce it?